How To Remove Rv Bathroom Vent Screen
Once the old cap is gone remove the rest of the old sealant. Replace the hinges and check to make sure they are secure.
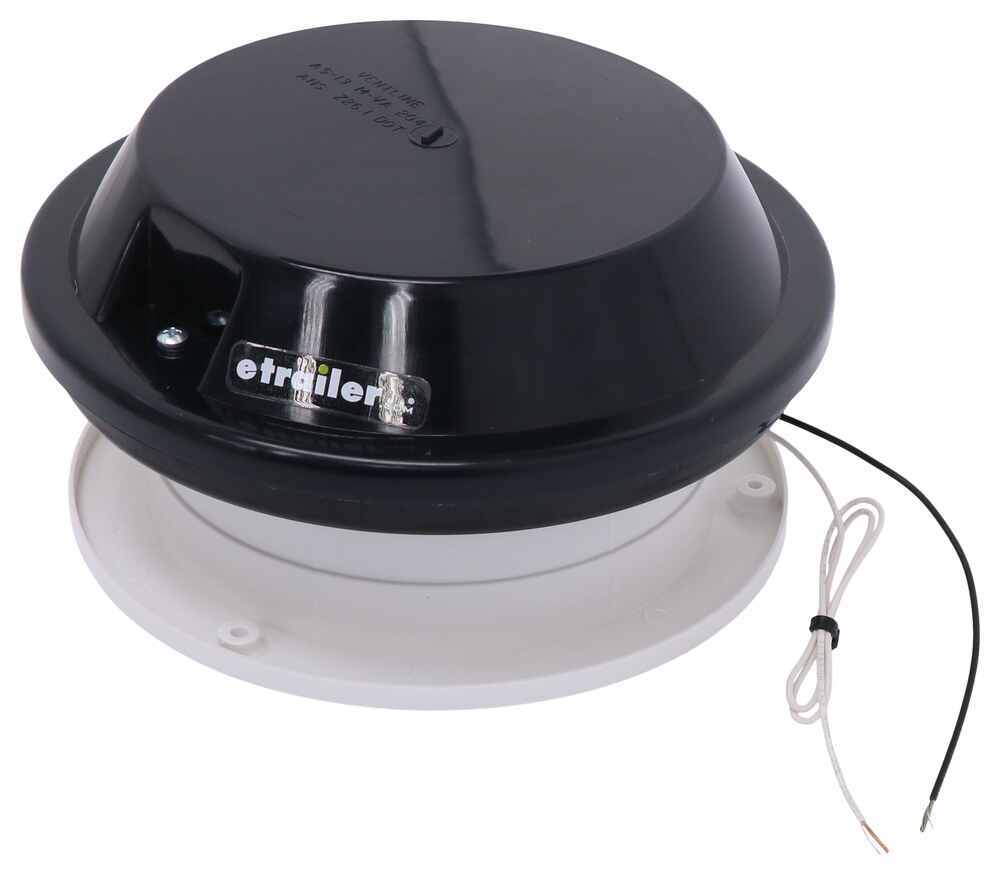
How To Replace Or Install An Rv Roof Vent Etrailer Com
We call these solutions hacks.

How to remove rv bathroom vent screen. Annually 11500. Fiamma Rollo Vent 40. The fans are used so often and move so much air that they get really dirty.
Well show you how to make your Fantastic fans look like new. Simply dampen the cloth and run it through your RV window screens. Straighten the tabs that go into the old vent and then take off the lid.
For standard non-power Ventadomes. 10 RV DIY Hacks You Need To See. We dont have a way to know what vent you have in your trailer as thats not info.
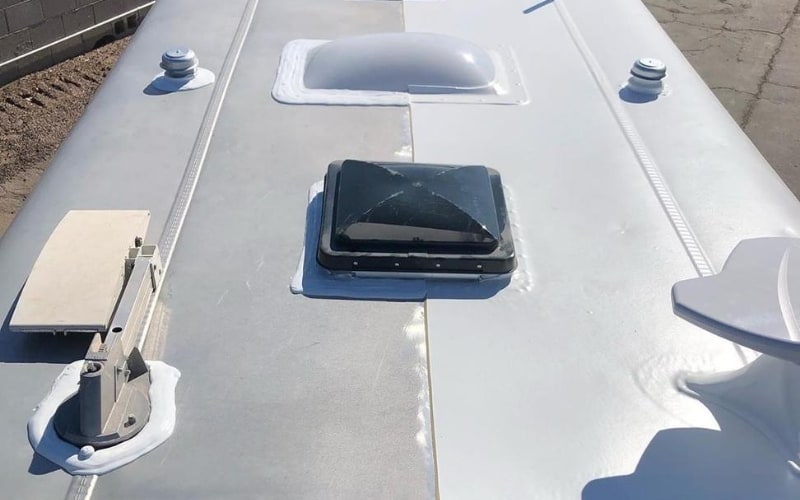
Make sure you know these simple installation instructions and RV window screens replacement so you can DIY it especially in times of dire need. Because your vent has a fan the procedure might be slightly different but the video will still provide you with a good idea of how the vent. Standard RV roof vents are great for removing stale air from your cabin but theyre not so proficient in replacing that old air with new cooler air.
It happened to us on a trip out west. And for some reason RVers more than almost any other group of people seem to flock to DIY solutions for simple RV problems. It was just one of those chance things when nickel-sized hail took out the bathroom.
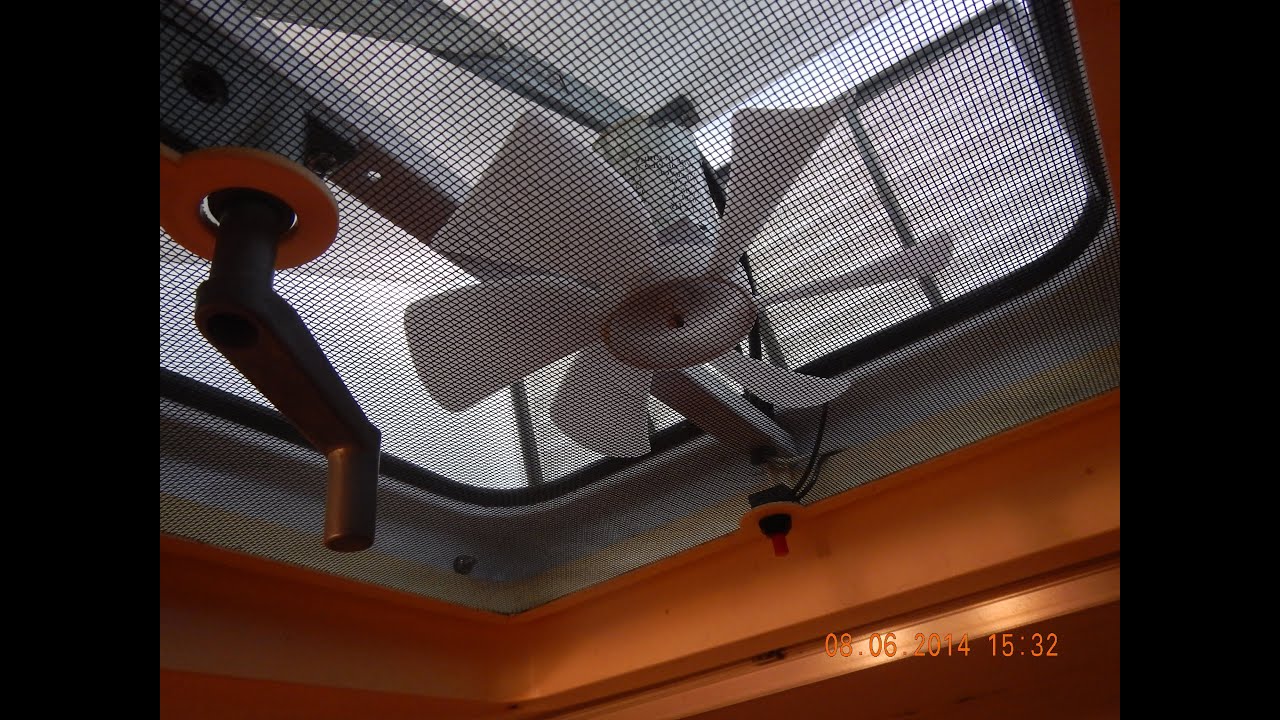
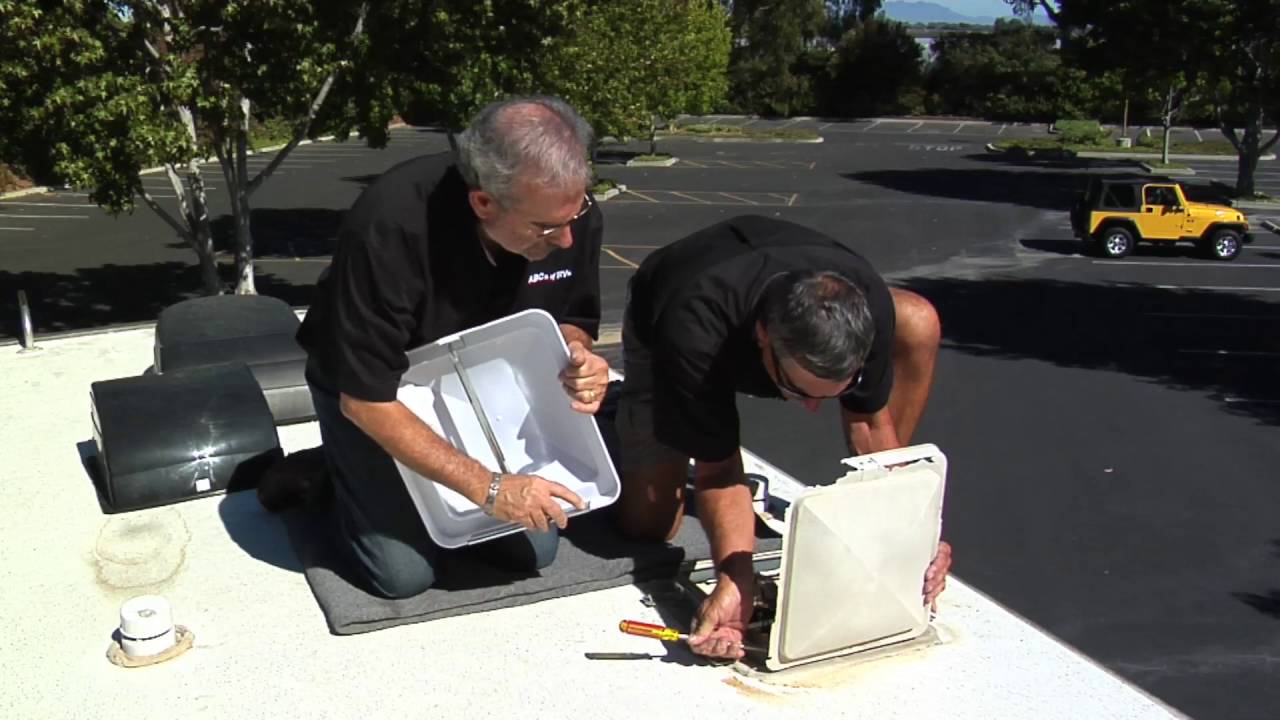
Hail storms have broken more rooftop fixtures than anything else. We demonstrate how to remove clean and reinstall a Fantastic vent fan in your RV. Take the 4 screws off the outer panel to drop the shroud.
To install the new cap put a good amount of lap sealant around the outside of the vent hole. There is no need to remove the ceiling garnish or the handle. This frame with removable screen replaces the old style single piece screen.
Once you are home get back onto the ladder and remove the pins from the hinge of the old vent. Start with the vent caps or covers from air units and remove the screws holding them on. Do not know if yours are exaclty like this but may be close.
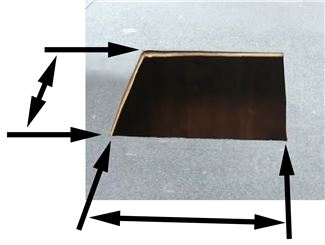
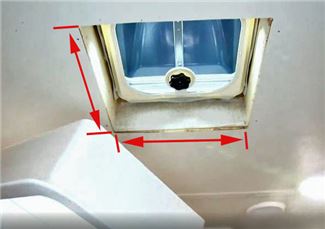
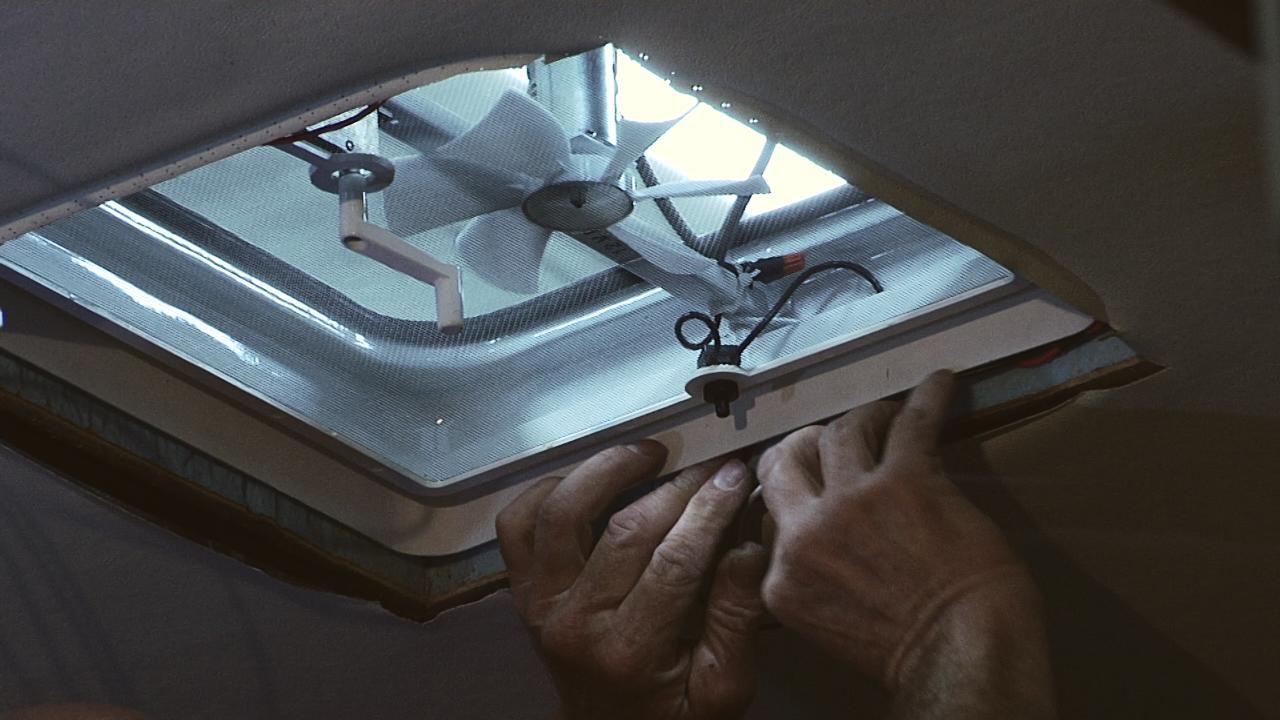
If you remove the 4 screws on the trim from the inside then the trim piece will fall out and you can remove the knob and then the screen can be removed and cleaned. Im standing on a ladder for most of this as. If you check out the video I attached to this page youll see a general guide for removing the screen of a roof vent in the the first minute of the video.
Last updated on March 11th 2021 at 0809 pm. Short of getting on the roof with a vaccuum cleaner you can take them down on the inside. For extremely dirty ones remove the whole frame and wash it with soap and water.
Unscrew the tip of the toilet rinsing wand and soak it in white vinegar to clean the holes. For that you need to upgrade to an electric RV power vent with a built-in fan. Clean out any debris or leaves that have lodged inside and wipe the vent pipes out so that air circulation is like new.
Begin by removing the old sealant using the putty knife. I Started replacing vent covers on the toy hauler camper also a replacement exhaust fan in the bathroom vent. Over time ultraviolet rays beating down on your RVs roof will cause the plastic vents to deteriorate to the point that a simple brushing by of a small branch will cause them to crumble away into dust.
Once a year or so we like to remove and super-clean ours. This process is basically standard amoung trailer roof vents so this process will be accurate for your vent. Birch White 2-piece frame with removable screen.
Simply detach the screen by pinching the tabs located around the perimeter. Take the crank handle off and then drop the screen and clean. Originally published on September 9th 2015.
Updated RV power vent models make it extremely simple to replenish the air in. Proper maintenance for these RV parts is necessary. As an aside if you have energy leftover after cleaning all your RV sinks faucets drains and spray nozzles a spray bottle filled with a water and white vinegar mixture is super for washing the windows.
Clean an RV Vent Fan. Next straighten out the tabs that go into the new vent and then put the tabs into the new roof vent. Once enough sealant is removed you should be able to remove the screws around the old cap and pull it off of the roof.
The procedure will involve removing the interior trim as well as the knob or crank and then the screen can be removed by taking out the screws that hold it in. Suit 400 x 400 Vents. This is how mine are made.
Carefully look at the openings and make sure that caulking isnt cracked or missing. If the vent has a fan in it you may have to remove the small fan switch on the screen to free it from the wires and be carefull putting it back on to get the wires tucked out of the way. Well it depends on the brand of roof vent you have.
Everyone loves a good DIY project. Fiamma Rollo Kit - Suit 500 X 500 Vents.
How To Replace An Rv Roof Vent Cover Etrailer Com
Rv Vents And Fans Accessories And Parts Etrailer Com

Rv Vent Cleaning Maintenance Tips Good Life Rv
Diy Rv Roof Vent Fan Repair Youtube
Upgrading The Vents In My Rv To Powered Vents

Ventline Vanair Trailer Roof Vent W 12v Fan 6 1 4 Diameter Smoke Ventline Rv Vents And Fans Vp 543sp
Rv Bathroom Fan Upgrade Heng S Vortex Rv Bathroom Bathroom Fan Rv

How To Install A Camco Rv Roof Vent Cover Tutorial Youtube

Installing An Rv Vent Cover
6 Best Rv Roof Vent Fans To Buy In 2021 Rving Know How
Replace An Rv Roof Vent Cover Youtube

Camco Rv Replacement Vent Cover Fan Install Youtube

Rv Bathroom Fan Upgrade Heng S Vortex Youtube

What Are The Best Rv Roof Vent Fans In 2021 Camp Addict

Cracked Rv Bathroom Vent Cover Replacement Youtube

Fulltime Rving Removing And Repairing An Rv Roof Vent Youtube
Upgrading The Vents In My Rv To Powered Vents

Rv Power Vent Installation A Step By Step Demo Rv Repair Club Rv Repair Club

How To Get Screen Off Bathroom Fan Forest River Forums
Post a Comment for "How To Remove Rv Bathroom Vent Screen"